
To add waiver text to the new Advantage Kiosk system, you will create and format it in Admin Portal
Access Waiver Definitions in Admin Portal
- Navigate to mgmt.adv.centeredge.io in your web browser.
- Log in with your Admin Portal credentials.
- Open the Guest MGMT tab.
Create the Waiver Text
This is where you will create and format your waiver text if you will use waivers on the kiosk. You can create multiple waiver documents from here as necessary.
- Click Add Waiver.

- Give it a Waiver Name.
- Enter the Minimum age to Sign, which means anyone under that age can't sign.
- Leave the Waiver Version field as it is.
- Every time you make a change to a waiver, it saves as a new version of the original. This lets you go back to previous versions if necessary.
- Enter how many days the waiver is valid for.
- If you are ever editing an existing waiver that has signed waivers associated with it, select Yes or No in the Is this version valid? field.
- If you select No, all signed instances of this version of the waiver will no longer be active. Users will have to sign a new waiver unless you select Yes again.

- If you select No, all signed instances of this version of the waiver will no longer be active. Users will have to sign a new waiver unless you select Yes again.
-
If there is existing Waiver Text in Advantage, copy and paste it into the waiver text field, otherwise, enter the waiver text.
- None of the checkboxes or auto-fill merge fields from the Advantage waiver text will work in Advantage Kiosk, and there are only two self-populating fields that are supported. To display the signee's name on the waiver, use |Signee.FirstName| and |Signee.LastName.| (case sensitive). There is, however, no need to include this in the waiver because each copy of the waiver contains a Signature Certificate, which includes all the signee's information, their signature, and the information for any minors attached. Anyone who signs a waiver receives a PDF copy via email, and the Signature Certificate is at the bottom.

- None of the checkboxes or auto-fill merge fields from the Advantage waiver text will work in Advantage Kiosk, and there are only two self-populating fields that are supported. To display the signee's name on the waiver, use |Signee.FirstName| and |Signee.LastName.| (case sensitive). There is, however, no need to include this in the waiver because each copy of the waiver contains a Signature Certificate, which includes all the signee's information, their signature, and the information for any minors attached. Anyone who signs a waiver receives a PDF copy via email, and the Signature Certificate is at the bottom.
- Remove any merge fields from the text, including the checkboxes.
- Replace the old checkboxes with the checkbox from the toolbar.
- Do this by placing the cursor where the checkbox should appear and clicking the check icon. You can also use the toolbar to format the text in such a way that it is easy to distinguish what parts of the document signers are agreeing to when they select the box.

- Do this by placing the cursor where the checkbox should appear and clicking the check icon. You can also use the toolbar to format the text in such a way that it is easy to distinguish what parts of the document signers are agreeing to when they select the box.
- When you have re-added all the checkboxes and are finished formatting the text, select whether the waiver is Active Immediately, or is Active on a Specific Date.
- Selecting Immediately means, as soon as you click Save Waiver, the waiver you configured here will be the current waiver. Selecting Specific Date lets you choose a date to activate the waiver, meaning whatever version was active before you began editing the text, remains active until that day.

- Selecting Immediately means, as soon as you click Save Waiver, the waiver you configured here will be the current waiver. Selecting Specific Date lets you choose a date to activate the waiver, meaning whatever version was active before you began editing the text, remains active until that day.
- Click Save Waiver.
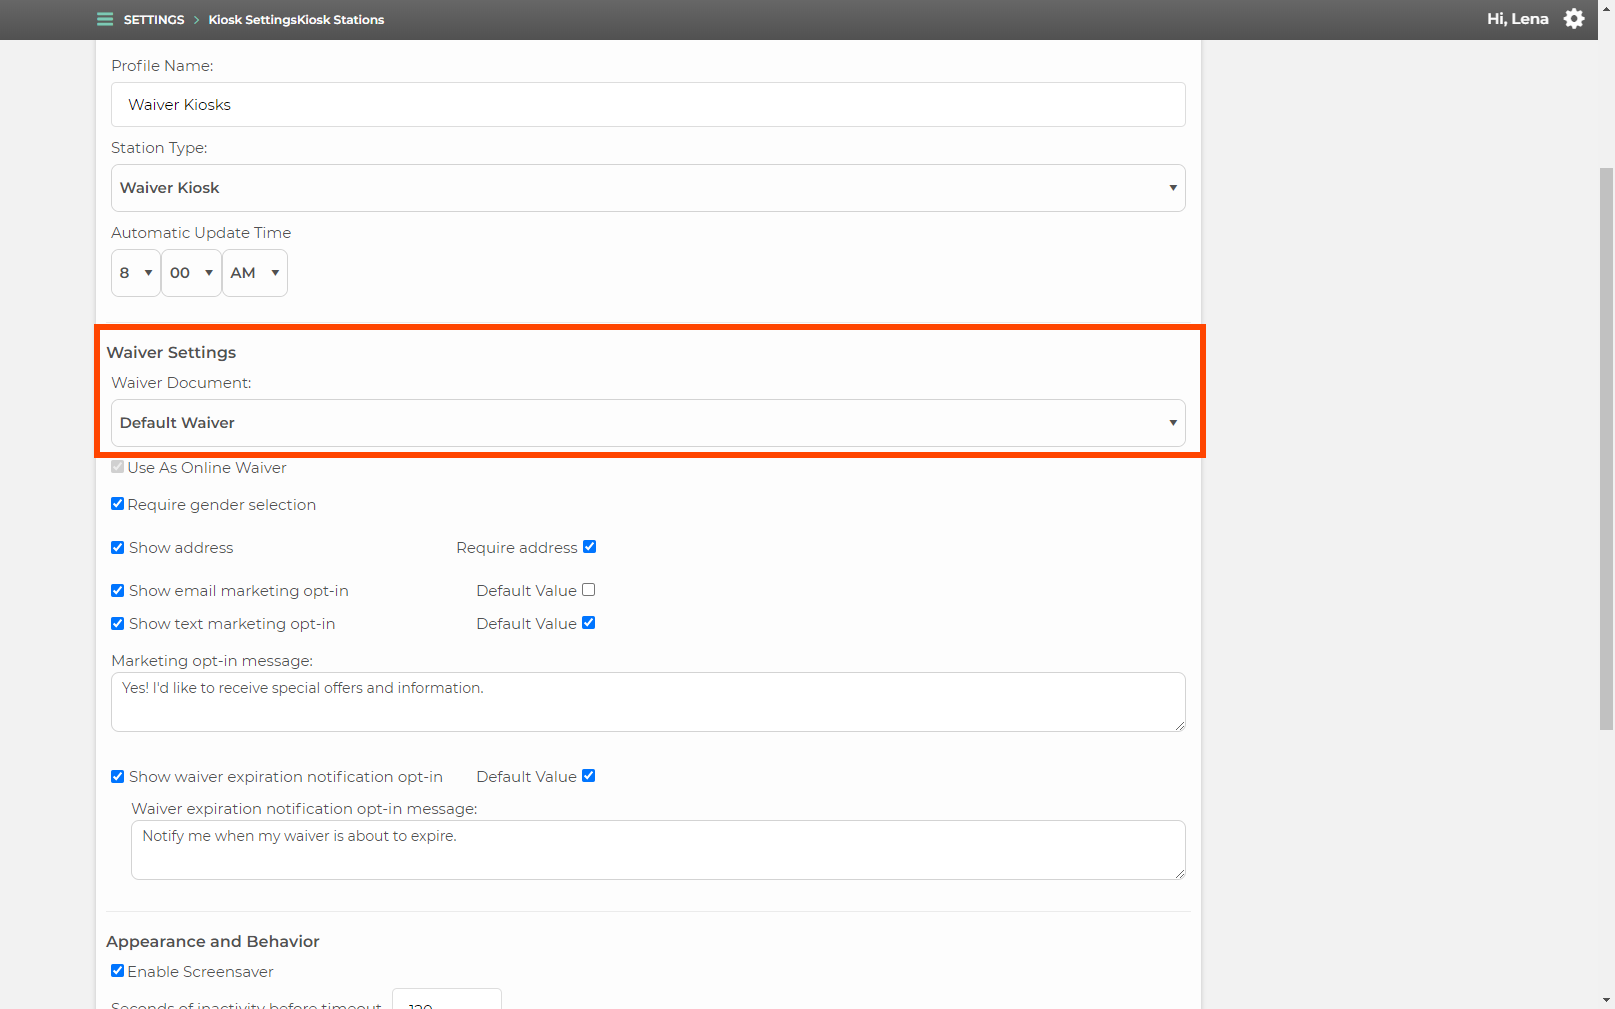
- Open the Settings tab.
Configure any necessary settings in this tab, including making sure the waiver you created above is selected as the Waiver Document for your Kiosk Profile.
At the time of export, this article was last updated . Navigate here to see the latest version: https://support.centeredgesoftware.com/hc/en-us/articles/360052758393-Adding-Waiver-Text-to-Advantage-Kiosk
Comments
0 comments
Please sign in to leave a comment.
Related articles