
The following is an outline of one of the thermal receipt printers we support, the Epson TM-T88V. You can also find more detailed information about the printer in the User Manual and/or the Technical Reference Guide.
Components
Cords
| Power Cord | USB Printer Cable | Serial Cable |
Ports
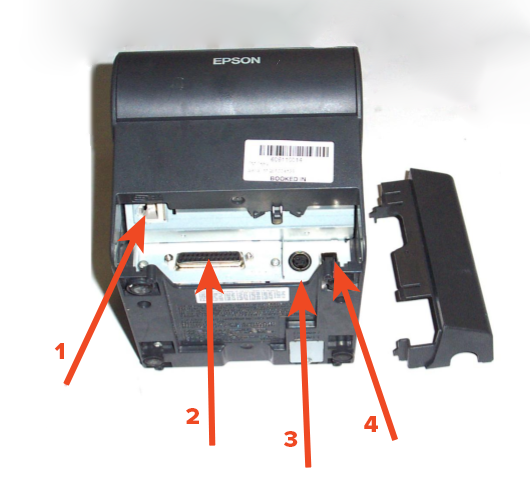
- Ethernet Port
- Serial Port
- Power Port
- USB Printer Port
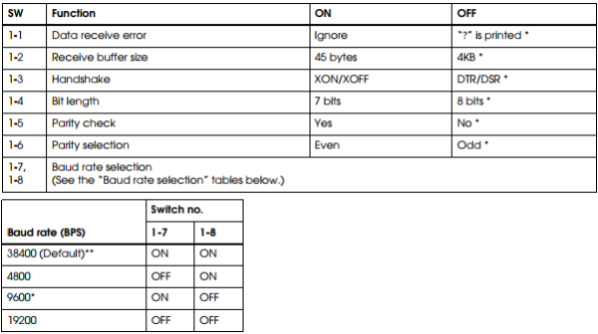
DIP Switches and Baud Rate
DIP switches are a set of switches inside the printer, which control some features of the printer that you will likely never need to adjust. One scenario where you may need to adjust these is changing the baud rate of the device. The baud rate is a measure of how many times per second a signal changes and its settings are on switches 1-7 and 1-8.
Incorrect settings often cause the printer to print what looks like gibberish. If a station will not print a proper test page from Windows, it will probably be because the baud rate is set incorrectly. The default Baud Rate for Windows is 9600.
- Turn off the printer.
This step is very important. Removing the cover while the printer is turned on may cause problems such as an electric short, which leads to a malfunction of the printer.
- Turn the printer over.
- Remove the DIP switch cover by removing the screw.
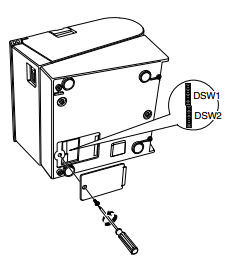
- Reference the images below to adjust the DIP switches using a fine-tipped tool.
- Replace the DIP switch cover, and fix it by installing the screw.
Control Panel Lights
Power LED (Green)
- Lights when the power supply is on.
- Goes out when the supply is turned off.
Error LED
- Lights or flashes when the printer is offline
- Lights after the power is turned on or after a reset (offline). Automatically goes out after a while to indicate the printer is ready.
- Flashes when an error occurs.
- Goes out during regular operation (online).
Paper out LED
- Lights when you need to install printer paper because there is little or none remaining.
- Goes out when there is a sufficient amount of roll paper remaining.
- Flashes when a self-test is in progress or when the printer waits for a macro execution.
Operation
Changing and Loading the Paper
- Make sure the paper you have is actually thermal printer paper.
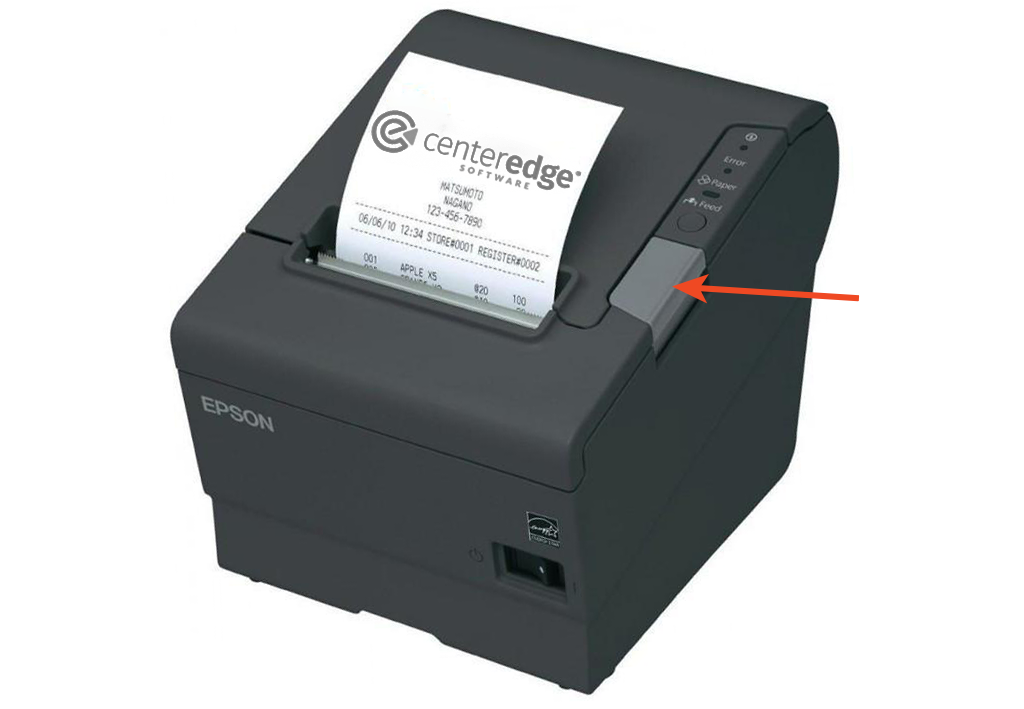
The most common test is to scratch the paper with someone’s fingernail and if it leaves a black mark, it is thermal paper. - Press the cover open button to reveal the inside.
- Remove the old roll if applicable.
- Place the new printer paper in the printer as shown in these images, making sure to pull out some of the paper.

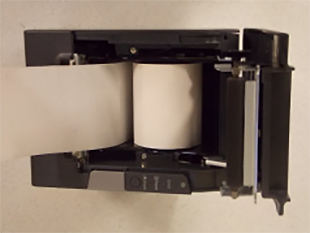
- Close the roll cover and tear off excess paper.
Comments
0 comments
Please sign in to leave a comment.
Related articles