
Keyboard wedge and serial scanners are set up in the software using the following instructions.
A typical POS scanner is a wired handheld model that self-installs and does not require the drivers mentioned below. After plugging it in, the setup sheet is all that is required. The wireless models can also be used, and may need the drivers as discussed.
Find The Bit Version of the Computer
- Open Windows Explorer.
- Right-click This PC.
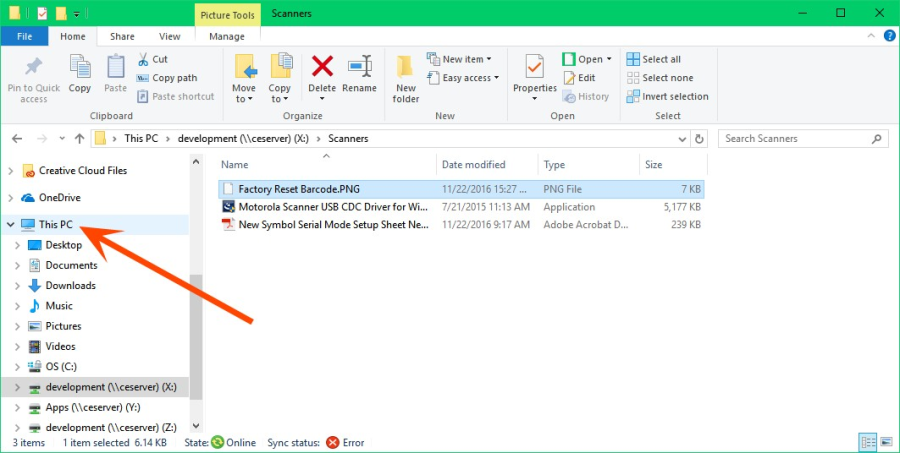
- Select Properties (These steps may vary depending on the operating system).
- Find the information labeled System Type to see the bit version (The following example is 64-bit).

Preparation
- Remove any scanner drivers from programs and features.
- Disconnect any scanners that are plugged into the computer.
If the Computer's Operating System is Windows 10
- Connect the jack end of the cable to the base of the charging station.
- Connect the USB end of the cable into an available USB port on the computer.
- The driver will install automatically.
You may need to perform a factory reset on the scanner if it is having trouble scanning the setup sheets.�
If the Computer's Operating System is Prior to Windows 10
- You must install the device CDC driver before connecting it.
- Download and install the appropriate driver for the device and bit version:
64-bit Motorola Scanner USB CDC Driver for Windows 7 64-bit.exe
32-bit Motorola Scanner USB CDC Driver for Windows XP and 7
64-bit Zebra_CDC_ACM_Driver_(x86)_v2.15.3000.exe
32-bit.exe Zebra_CDC_ACM_Driver_(x64)_v2.15.3000.exe - Connect the jack end of the cable to the base of the charging station.
- Connect the USB end of the cable to an available USB port on the computer.
Redemption Setup
Set the Initial Scanner up as a Keyboard Wedge
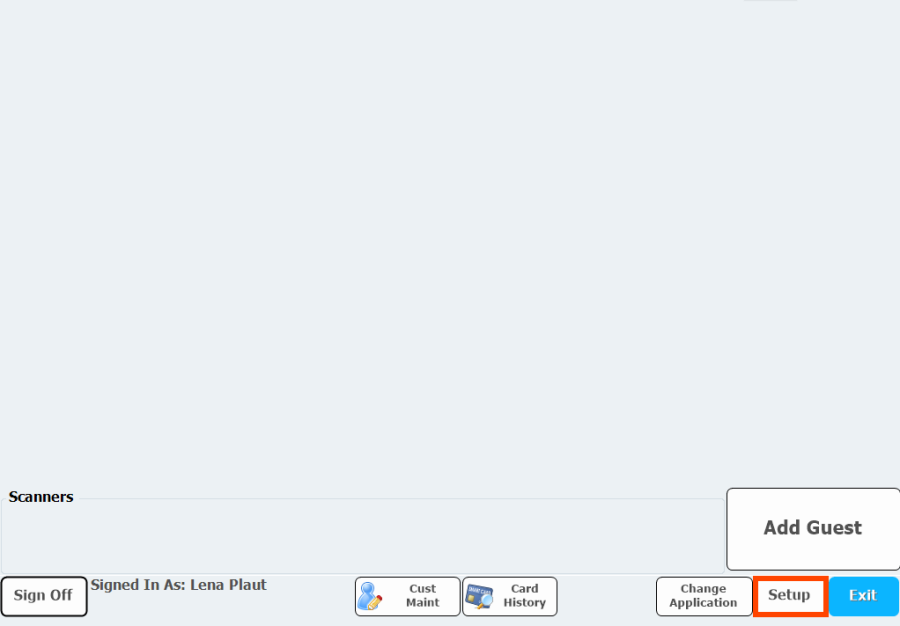
- Open Redemption.
- Click Setup.
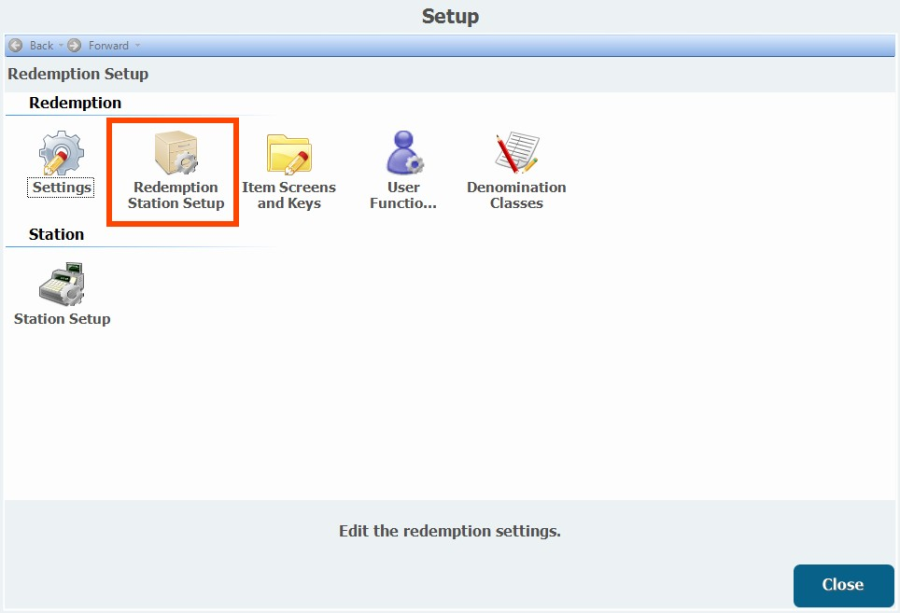
- Double-click Redemption Station Setup.
- Select the Station.
- Click Edit.
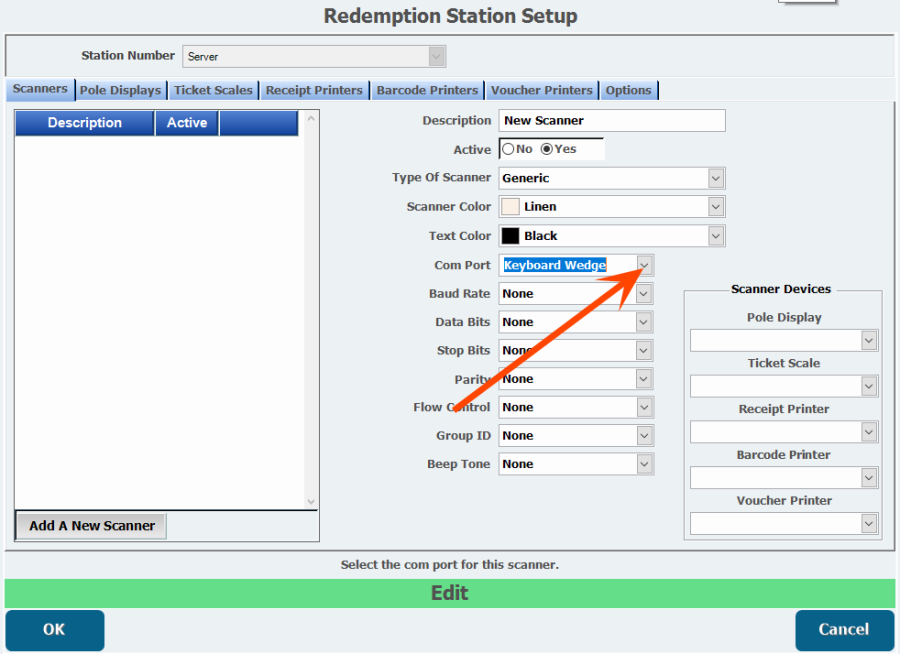
- Click Add a New Scanner.
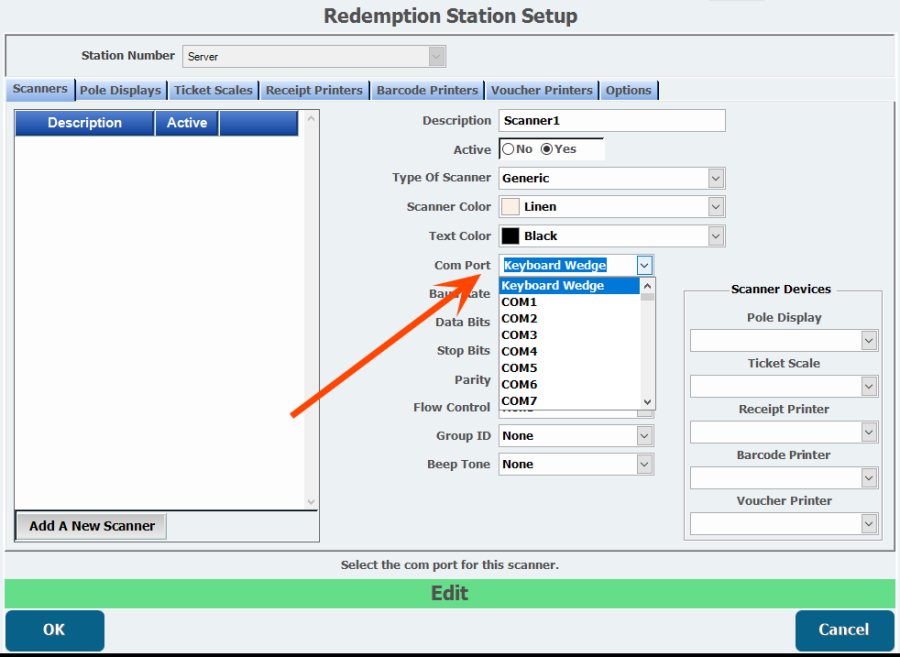
- Enter a Description.
- It is recommended, though not required, that a scanner be physically labeled with the same name as its description (typically with the color that is assigned via the scanner color field).
- Select whether the scanner is Active.
- Type of Scanner is used to set specific scanner types. Unless the scanner to be configured is one of the two specified types (Voyager MS9540 or WelchAllyn 5570), this should be left as Generic.
- Select a Scanner Color.
- This color will be in the background on the redemption screen to show which scanner is being used.
- Select a Text Color.
- This is used to determine the default color any scanner related text will display in.
- Select Keyboard Wedge as the Com Port (In 18.1 this is the default Com Port).
- The Com Port pull-down in Redemption Station Setup sets which of the station's Com ports or virtual Com ports the scanner is connected to. Each scanner in a station should have its own Com port selection, because multiple scanners connected to the same port will cause issues. Only one scanner should ever be set to act as the keyboard wedge for the same reason.
- The Com Port pull-down in Redemption Station Setup sets which of the station's Com ports or virtual Com ports the scanner is connected to. Each scanner in a station should have its own Com port selection, because multiple scanners connected to the same port will cause issues. Only one scanner should ever be set to act as the keyboard wedge for the same reason.
- The following pull-down lists can generally be left as they are.
- Group ID is used for wireless scanners that share a base. Scanners set to use a specific group will all be able to communicate with the same base. If you do not use wireless scanners, or use wireless scanners that each have their own bases, this field is not required.
- Beep Tone determines the sound played whenever the scanner completes a scan.
-
Scanner Devices determines what Pole Display, Ticket Scale, Receipt Printer, Barcode Printer and Voucher Printer, if any, are associated with the selected scanner. Each of these items need to be configured on their own tabs before they can be selected for a scanner.
- Click OK.
- Scan the barcode on the base of the scanner to pair it.
- Scan the�Keyboard Mode Redemption Setup Sheet from top to bottom.
- From the Windows Start Menu, enter cmd.
- Press Enter.
- Scan a barcode from a player card into the command prompt to test it.
- A barcode number should display. If not, scan the setup sheet again.
For Subsequent Scanner Setup Gather Com Port Data
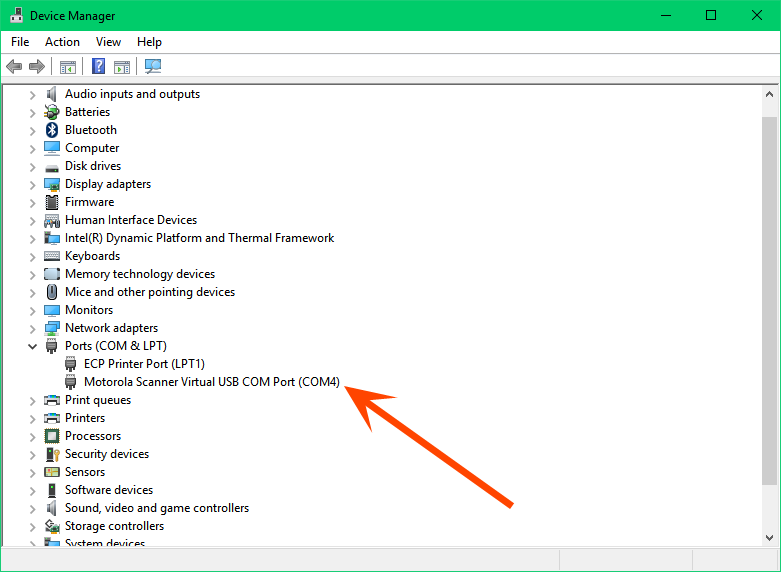
- Open Device Manager in Windows.
- Expand Ports (COM&LPT).
-
Scan the first barcode on the Serial Mode Setup Sheet (CDC COM Emulation). The Device Manager should update/refresh to show a particular port assigned to the scanner device.
-
Double-click the communication port that is being used.
- Open the Port Settings tab.
- Write down the information in this tab (these are the default values for the device). You need this information to set up the scanner in Redemption.
- Open Redemption.
- Click Setup.
- Double-click Redemption Station Setup.
- Select the Station.
- Click Edit.
- Click Add a New Scanner.
- Enter a Description.
- It is recommended, though not required, that a scanner be physically labeled with the same name as its description (typically with the color that is assigned via the scanner color field).
- Select whether the station is Active.
- Select a Scanner Color.
- This color will be in the background on the redemption screen to show which scanner is being used.
- Select a Text Color.
- This is used to determine the default color any scanner related text will display in.
- Select the Com Port you determined in the previous steps.
- Select the other settings you wrote down in step 6 as they correspond to the following pull-down lists.
- The following fields can generally be left as they are.
- Group ID is used for wireless scanners that share a base. Scanners set to use a specific group will all be able to communicate with the same base. If you do not use wireless scanners, or use wireless scanners that each have their own bases, this field is not required.
- Beep Tone determines the sound played whenever the scanner completes a scan.
-
Scanner Devices determines what Pole Display, Ticket Scale, Receipt Printer, Barcode Printer and Voucher Printer, if any, are associated with the selected scanner. Each of these items need to be configured on their own tabs before they can be selected for a scanner.
- Click OK.
- Scan the rest of the Serial Mode Setup Sheet from top to bottom, skipping the top barcode, which you should already have scanned.
- From the Windows Start Menu, enter cmd.
- Press Enter.
- Scan a barcode from a player card into the command prompt to test it.
- A barcode number should display. If not, scan the setup sheet again.
POS Setup
1. Scan the Keyboard Mode POS Setup Sheet from top to bottom.
Comments
0 comments
Please sign in to leave a comment.
Related articles